Contents
Welcome to our website about different water sports.
Here you can read guides and introductions to different water sports. We also plan to add guides to different destinations that offer especially good water sporting opportunities. Places like Hawaii, Utila, Malapascua Island, Fuerteventura, and Phuket. This site is still small, but we hope to build a large comprehensive water sports website.
Popular water sports
Waterskiing
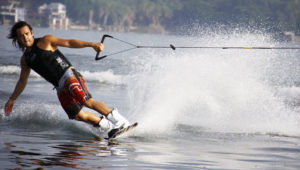
Water skiing is one of many surface water sports where an individual is pulled behind a boat over a body of water, skimming the surface. In water skiing, the person is wearing one or two skis. Read more…
Water skurfing
 Water skurfing is similar to water skiing, but a board is used instead of skis. The term is a portmanteau of (water) skiing and surfing. During water skurfing, the skurfer rides behind the boat, on the board, in a fashion similar to when a surfer rides a wave – but the skurfer holds on to tow rope. Read more…
Bodyboarding
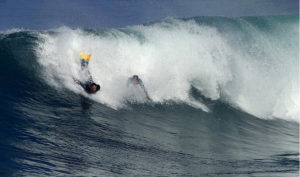 Bodyboarding is water sport where you ride a bodyboard on a wave. The bodyboarder rides on both the crest, face and curl of the wave, and will be moved by the wave towards the shore. The typical bodyboard is a short (circa 40 inches / 1 meter), rectangular piece of hydrodynamic foam. Read more…
Kiteboarding
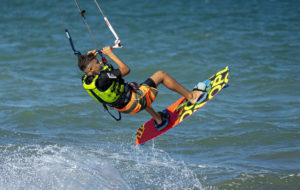 Kiteboarding is a sport where a large controllable power kite is used to propel the participant across land, water or snow. There are many different variants of kiteboarding, and wave riding – also known as kitesurfing – is one of them. It can be described as a combination of kiteboarding and surfing. Read more…
Paddleboarding
 Paddleboarding is a sport where the participant is lying or kneeling on a board in the water while propelling the board using their arms in a swimming motion. Experienced paddleboarders tend to have great stamina and competitive paddleboard races tend to be long – 20 miles or more. Read more…
Standup paddleboarding
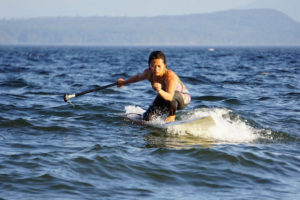
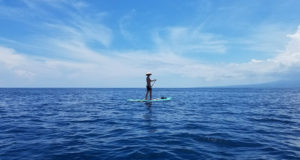 With traditional wave surfing, you must have access to suitable waves. With stand-up paddleboarding, you make your own propulsion using a paddle (or pole). It can, therefore, be carried out on flat waters, including lakes, rivers, canals and calm parts of the ocean. Read more…
Sit-down hydrofoil
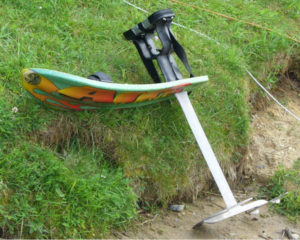 With a sit-down hydrofoil, you sit-down and ride the water behind a powerboat or other towing vessel. As you pick up speed, the board of the hydrofoil will “fly” just slightly above the surface of the water. This means that your ride isn’t heavily impacted by wake or chop. Also, compared to sports such as water skiing, less strength is required since the resistance is lower. Read more…
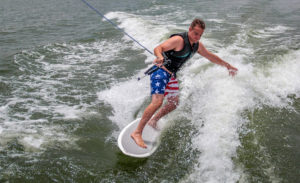
Wakeboarding
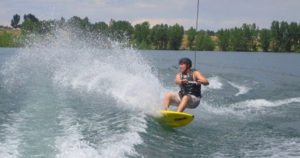
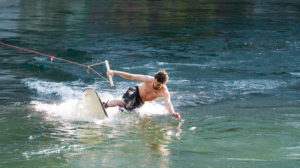 Wakeboarding is a water sport where the rider stands on a board and is towed behind a powerboat. The board will ride on the wake produced by the boat. Wakeboarding has become very popular in the 21st century and is included in the X-games, an annual extreme sports event hosted by the ESPN. Read more…
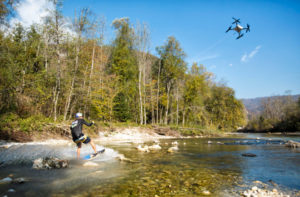
Wakesurfing
 Wakesurfing is a sport where the rider rides a boat’s wake, without being directly pulled by the boat. A tow rope is typically used initially, but once the rider has gotten up on the wake, they will drop the rope and ride the steep face below the wave’s peak. In this regard, wake surfing is similar to traditional (wave) surfing. Read more…
Wakeskating
 Wakeskating, a sport pioneered by Thomas Horrell, developed out of wakeboarding, and the two sports are quite similar and both tend to use a board manufactured from fiberglass or maple. The major difference is that with wakeskating, the rider is not attached to the board. Therefore, the experience is more similar to skateboarding. Read more…
Safety first
It is very important to prioritize safety when engaging in different water sports. All too many people get injured each year in water sport-related accidents and we behind Aquaskier believe that we should do all that is possible to prevent this. It is impossible to completely eliminate the risk of accidents. You can never control everything and freak accidents can happen but there is a lot you can to reduce the risk of accidents. Some of the most important things to consider are:
- Allow yourself time to learn the watersport well. Do not attempt more advanced techniques until you have truly mastered the basics. Stay in safe areas until you mastered the basics.
- Assume that you will be rusty if you haven’t engaged in the sport for a few months. Allow yourself some time to get your groove back.
- Make sure that you are physically fit to engage in the water sports in question. Do not water sport when you are sick or recuperating from an injury.
- Make sure to use all appropriate safety equipment.
- Do not do anything in unknown waters. Use a boat to careful scout the waters before engaging in any water sports. Make sure there are not hidden sunken trees, rocks, or other potentially harmful objects in the water.
- Do not engage in any water sport in busy waters. You might put yourself or others in danger.
- Do not trust the tourist guide telling you that something is safe for everyone. They are salesmen. Perform a quick internet search to make sure.
- Make sure your equipment is in perfect condition.
- Know what to do in the event of an accident. Know where you can find help.
- Always make sure that you have access to a mobile or a radio that you can use to contact first responders if needed.
- Take any other need safety precaution suitable for the water sport you want to engage in and the area where you plan to engage in it.